LESSON 2
ABC Quick Check
Goals
- Cyclist is able to conduct the ABC Quick Check correctly on their own
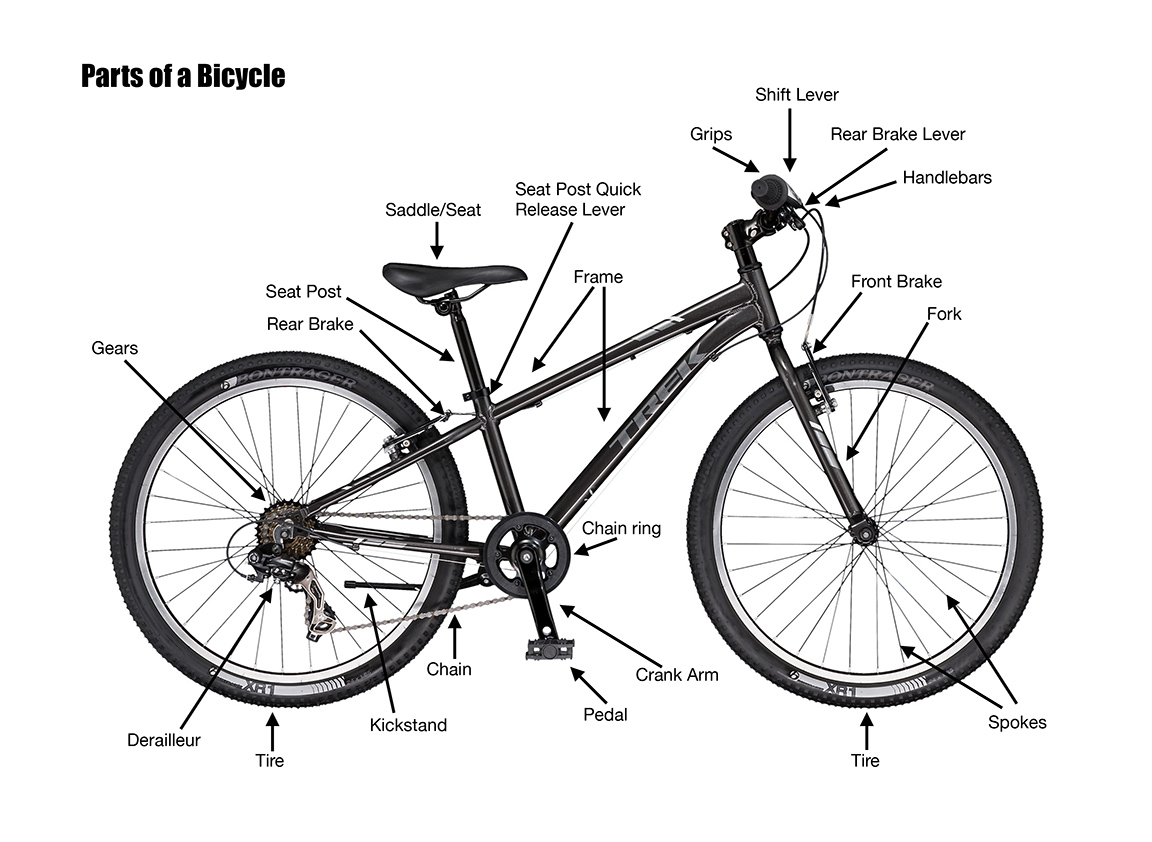
- Identify the basic parts of the bicycle
Overview
This lesson teaches students important safety checks to perform before each ride to ensure that the bicycle is in good working condition. There is an easy way to remember this. It’s called the ABC Quick Check.
Volunteers will also teach students the many parts of a bicycle by reviewing common terms and by engaging the group in a fun bicycle parts relay game.
*NOTE: Students should perform the ABC Quick Check each session before they ride their bicycles.
Tip: Be mindful of technical vocabulary. If introducing a new word (ex. Drivetrain) be sure to help define it "the drivetrain is what we call all the parts that work together to make the bike GO".
Volunteer Connector
Ask students these questions about what they would need to check before playing a game of basketball
- Q: Does the basketball need more air or is it too soft to dribble?
- Q: Would it be more fun to play with a ball that could bounce properly?
- Q: Why do think we should inspect our bikes before riding?
A: All answers are acceptable.
Bikes are considered vehicles on the road and it is important to be ready to ride... each and every time. A bicycle that is not "road ready" can be dangerous to the cyclist. The activities we will learn today are important safety checks to ensure a bicycle is safe and in good working condition before we ride.
Preparation
- Arrange students in a “U” shape to facilitate all students being able to watch your instruction.
- Use questions to prompt cyclists’ thinking about the content in this activity.
- After going over lesson, divide group into 3 smaller groups (Air, Brake and Chain) with a volunteer guiding the discussion. Rotate every 5-10 minutes.
Equipment
- Bicycle Part Tags
- Bicycle Parts Worksheet
- ABC Quick Check Worksheet
ABC Quick Check Bicycle Inspection
Instructions
Demonstrate the ABC Quick Check for the whole group, going through each step and describing the use of the 'Letter' as an easy way to remind them of the steps.
Using the demonstration bike, allow students to:
- Feel the difference between proper pressure and low pressure.
- Squeeze each brake while pushing the bicycle forward and backward to ensure that it stops.
- Flex the chain to test tension and wiggle the crank arm to ensure its stable.
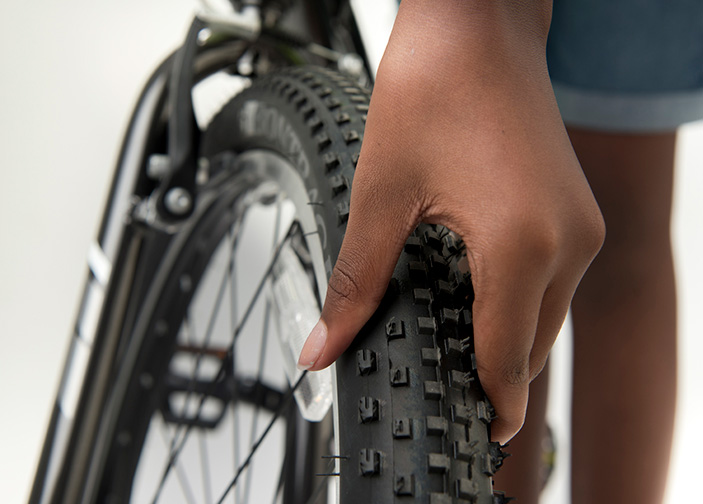
A is for AIR
Tires should be relatively hard, like an apple, not soft, like an orange to prevent flats and have more comfortable ride.
Demonstrate how to use the air pump and pressure gauge. The proper tire pressure is imprinted on the side wall of the tire. After instruction, students should be able to use club’s air pump themselves.
Check wheel bolts and check for "wheel wiggle" or play which may require service by an adult.
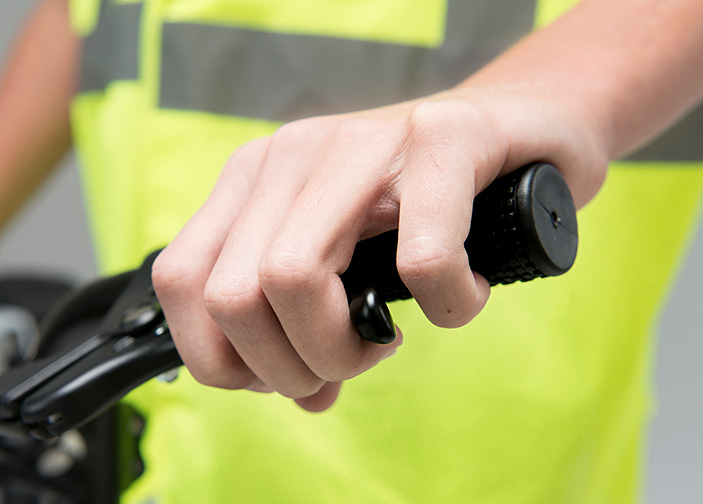
B is for BRAKE
Apply brakes while pushing the bicycle forward and backward to ensure that the bicycle stops.
Discuss differences between the front and rear brake. The front brake is controlled by the left hand. If it’s pulled too hard, it can cause an "endo" in which the front wheel stops completely and the back wheel comes off the ground. The rear brake is controlled by the right hand and the right/rear brake lever should be identified with blue or green masking tape wrapped around the lever. Both brakes should be used in combination for maximum control.
Squeeze brake lever to ensure at least 1” of space between lever and bar.
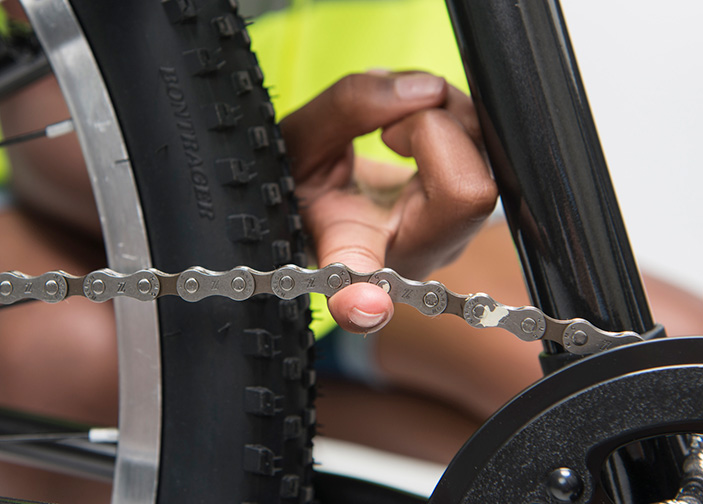
C is for CHAIN and CRANK
The chain should be tight and completely on a gear to help prevent it from falling off. Check that the chain is free of rust and gunk.
Check the cranks by grasping the crank arm and attempt to wiggle to ensure the crank is securely attached to the frame.
Discuss other parts of the bicycle that interact with the chain (i.e. the drivetrain) such as pedals, cranks and gears.
Tip: Encourage students to look at the bicycle as a whole when performing ABC Quick Check: Loose bolts, knocking noises, frayed cables, anything that doesn't look or feel quite right should be inspected by a volunteer.
Bicycle Parts Relay
Instructions
- Present and explain to the group all the parts that will be used in the relay beforehand. Make note of the 3 contact points (seat/saddle, grips, and pedals).
- Mark off two lanes that are approximately 25 yards long and place two bicycles (one in each lane) at the end of the lane and a pile of Bicycle Parts cards at the start with the racers. If possible, have a volunteer help students with questions about the part before they run to the bicycle.
- Racers form lines behind the pile of cards on the floor.
- On 'Go' the first student in line picks a card off the floor and runs to the bicycle at the end of their lane and “tags” that part by attaching the card to the part.
- After tagging the part, the student runs back to their team line and high fives the next student in line so that they can tag the next part.
- When both teams are finished, have all the students gather around the bicycles while the teacher calls out the parts to see if they are tagged correctly.
Volunteer Connector Summary
Team Builder — Use answers to prompt discussion and review. Have cyclists share their responses out-loud.
- What does ABC Quick Check stand for?
- Name parts that are important to check.
- Name the 3 contact points of the bicycle.
- Name 3 parts you would find attached to the frame of a bike.
- Name 3 parts that are part of the drivetrain.